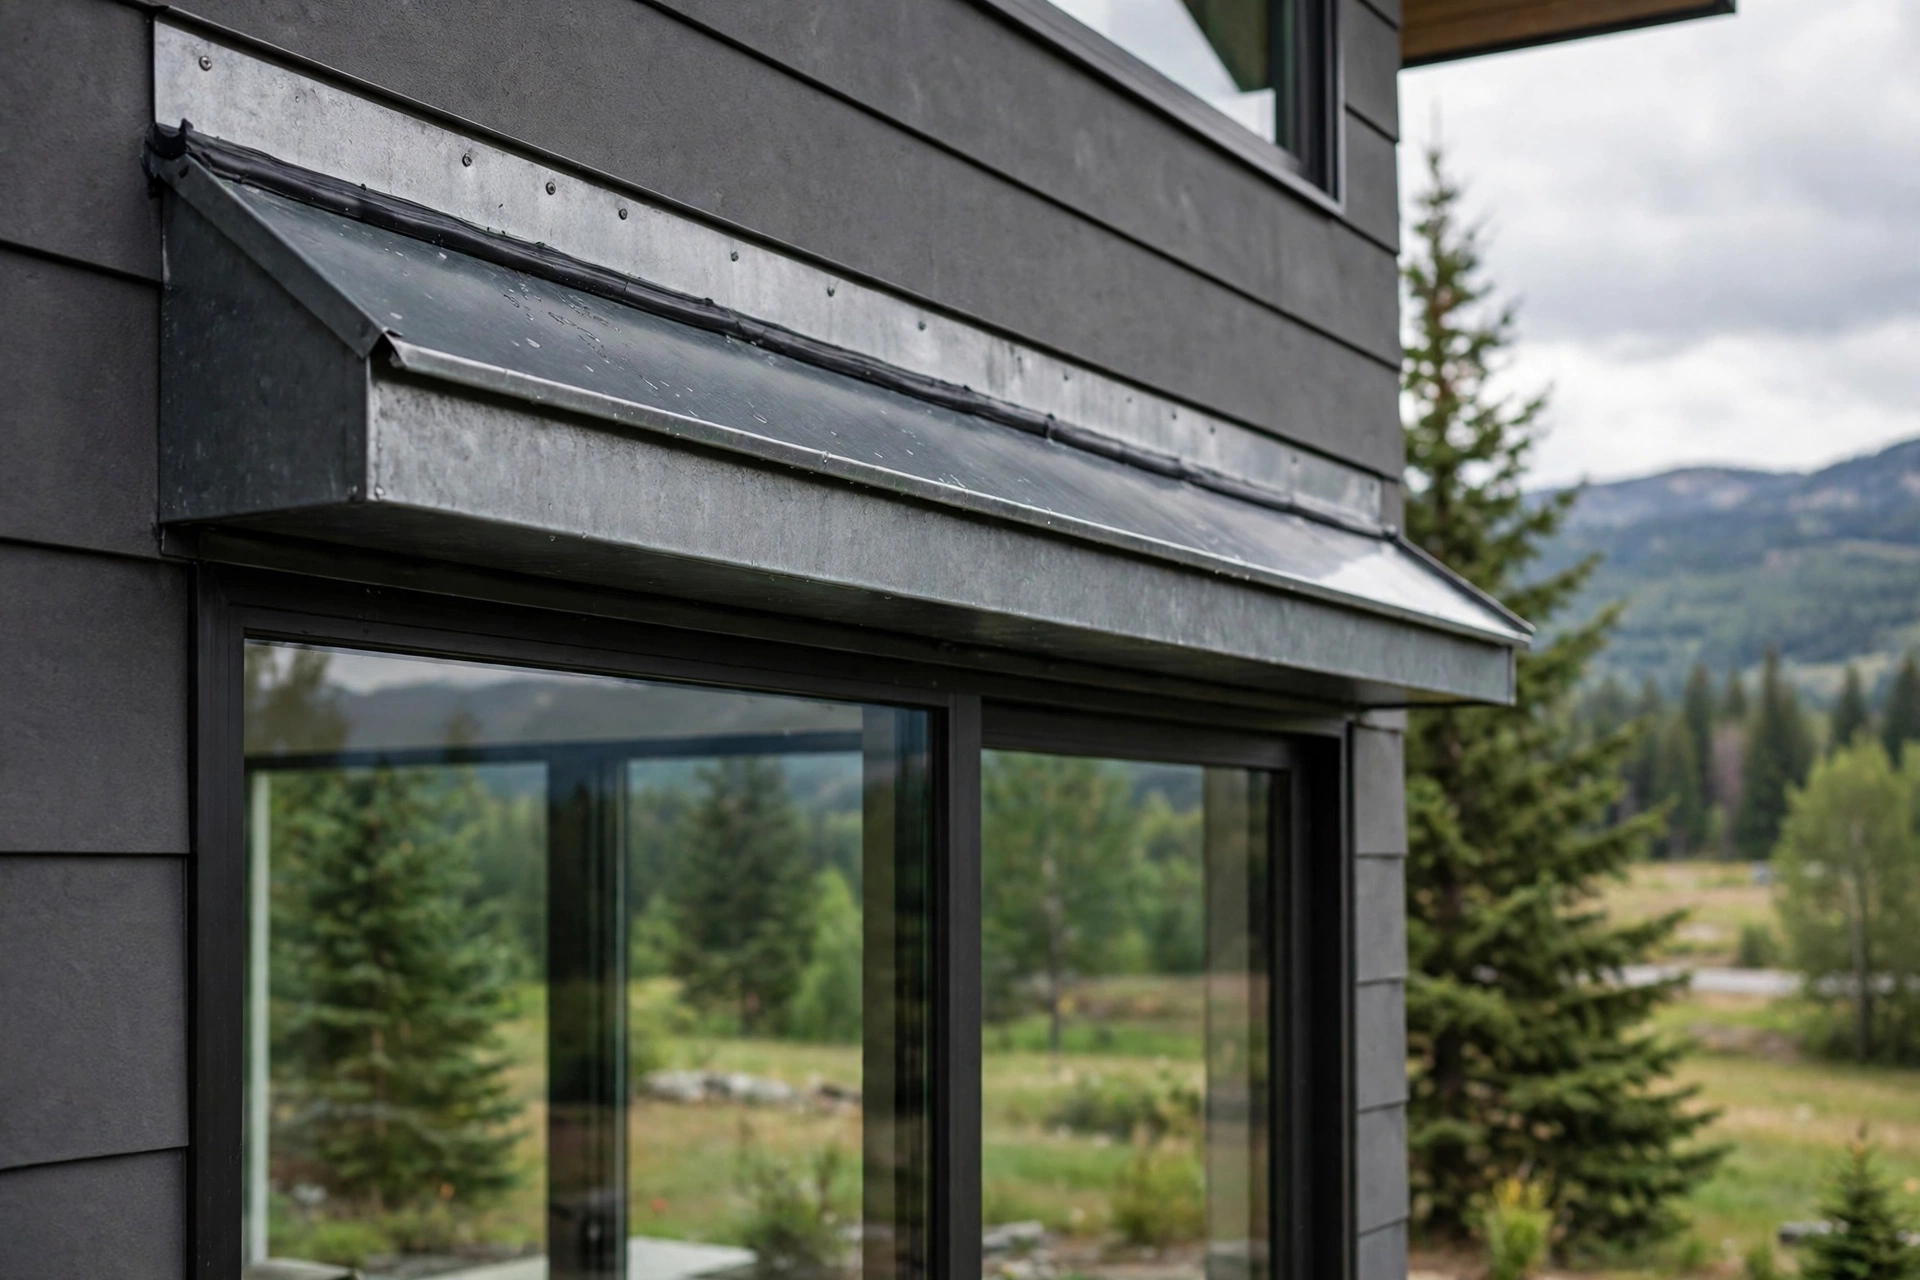
Innovative Residential Window Head Flashing Designs for Managing Water Around Large Glass Openings
The head flashing above a large glass opening works like a small roof built into the wall: it catches water running down the cladding above the window and throws it clear of the frame, the seals, and the wall cavity below. On a wide opening that job is harder, because a long span collects more water and gives a leak more places to start.
The designs that hold up best combine a rigid metal drip profile or a continuous self-adhered membrane at the head, a drained sill pan at the bottom, and side flashing lapped in the correct order so every layer sheds water onto the one below it, exactly like shingles. Get that sequence right and a glass wall can stay dry for decades.
How Water Reaches the Head of a Wide Glass Wall
Rain rarely hits a wall straight on. Wind drives it upward and sideways, and water running down from the storeys above gathers speed and volume before it reaches the window head. Cladding joints, trim boards, and the frame all shed water onto the same line, so the head flashing on a wide opening can be asked to move several litres a minute during a heavy storm.
Capillary action adds a second route that many homeowners never see. Water can climb a few millimetres uphill along a tight joint between two flat surfaces, which is why a head flashing needs a drip edge or a kerf — a small groove that breaks the surface tension and forces water to fall away from the wall. A slight outward slope of two or three degrees keeps water moving toward the drip edge instead of sitting against the frame.
Which Metal Head Flashing Profiles Suit Broad Glass Spans
A metal drip cap is the oldest and still one of the most reliable head flashing designs, and it scales well to wide openings when the profile is chosen properly. One leg tucks behind the weather-resistive barrier above the window while the other projects out over the frame with a downturned drip edge. On spans wider than about two metres the profile needs stiffness — a heavier gauge, a hemmed edge, or a stiffening rib — so it holds its line instead of sagging.
The critical detail on a long drip cap is the joint. A single length of metal is always better than two pieces butted together, because every joint is a future leak. Where a span forces a joint, overlap the pieces by at least 150 millimetres, seal the lap, and back it with a strip of self-adhered membrane. End dams — small folded-up tabs at each end — stop water running off the ends of the cap and down the jambs.
Aluminium, Steel, and Stainless Head Flashing Profiles Compared
Aluminium suits most residential work and forms easily around gentle curves. Galvanised steel gives more stiffness for the same money on long straight runs, while stainless steel is the answer where salt air or a very wide span rules the others out. Whatever the metal, keep it compatible with the cladding and fasteners touching it, because galvanic corrosion between dissimilar metals shows up as a stain first and a hole later.
| Profile material | Best span | Strengths | Watch out for |
|---|---|---|---|
| Aluminium drip cap | Up to about 3 m | Light, easy to form, resists rust | Soft — needs a hem or rib on long runs |
| Galvanised steel | Up to about 4 m | Stiff, economical, holds its line | Cut edges can rust if left unsealed |
| Stainless steel | Over 4 m | Very stiff, corrosion-proof, long life | Costly and harder to form on site |
| Vinyl head flashing | Standard sizes only | Cheap, built into many frames | Flexes and cracks; poor for wide spans |
That table is a starting point, not a specification. A structural engineer or the window manufacturer's installation guide should confirm the profile for any opening wider than about three metres.
Self-Adhered Membrane Head Flashing on Oversized Openings
Self-adhered flashing membrane — a rubberised asphalt or butyl sheet with a peel-off backing — has become the workhorse of modern head flashing. It arrives in a continuous roll, conforms to uneven surfaces, and bonds to the wall and to itself at laps, creating a monolithic layer water cannot easily get behind. On a broad span it runs in one strip across the full width plus 150 millimetres past each jamb, so there are no joints in the field.
The membrane's weakness is temperature and surface preparation. Most membranes need the substrate above about 5 degrees Celsius and free of dust, frost, and moisture, plus firm roller pressure along every centimetre of the bond. In cold weather a primer can help, but on a freezing day the honest answer is to wait: a membrane applied to a cold, dusty surface will peel away within a season.
- Clean and dry the sheathing sweep off dust and let damp sheathing dry fully before the membrane goes on.
- Prime when the maker calls for it a compatible primer on porous sheathing or in cool weather improves the bond.
- Roll every lap firmly use a hand roller along laps and edges so the membrane beds into the substrate.
- Lap like shingles the head strip laps over the side flashing, never the reverse, so water sheds outward.
A membrane head flashing should never be the only line of defence on a wide opening. It is at its best as the hidden waterproofing layer beneath a metal drip cap: the cap sheds the bulk of the water and protects the membrane from sunlight, while the membrane seals the joints the metal alone cannot.
Why Large Glass Openings Leak Differently From Standard Windows
A standard window leaks at a point — a failed corner or a cracked seal. A wide glass wall leaks along a line, and the failure is usually systemic. The longer the head, the more the framing moves with seasonal temperature swings, working sealant joints open a fraction of a millimetre at a time. Over several years a joint that was airtight on installation day can admit wind-driven rain across a broad area of sheathing.
Stacked and mulled glass units add another wrinkle. Where two units are joined side by side, the mullion joint is a vertical seam running the full height of the glass, and it must be flashed as carefully as the head. Water that gets past the head flashing can travel sideways along the mullion, so the head flashing on a mulled opening should extend past the mullions and be sealed to them.
Sequencing a Watertight Head Flashing Installation
Order matters more than materials. Flashing works as a system only when each layer is installed in the right sequence. The reliable sequence starts before the window arrives: the rough opening is prepared, the weather-resistive barrier is cut and folded correctly, and the sill pan goes in first, because everything above it must drain onto it. The side flashing goes on next, lapped over the sill pan, and only then the head flashing, lapped over the sides.
- Prepare the rough opening check it is square and level, and repair damaged sheathing first.
- Install the sill pan first a sloped pan with end dams catches anything that gets past the window and drains it outward.
- Flash the sides second side strips lap over the sill pan and extend past the head, ready to receive the head flashing.
- Set the head flashing last it laps over both side strips, with end dams folded up, so water sheds from head to sill.
- Seal the flanges and trim sealant is the final touch, not the primary defence — it should back up the laps, not replace them.
A water test at the end is the cheapest insurance on the job. A controlled spray from a garden hose, worked from the bottom of the window upward in stages, will show whether the flashing sheds water or channels it into the wall — far better to find that out before the cladding goes on than after the first real storm.
Sill Pans, End Dams, and the Drainage Path Below Wide Glass
Head flashing gets the attention, but the sill pan does the quiet work of catching whatever gets through. On a wide opening the pan must be continuous across the full width, sloped to the outside so water drains rather than pools, and fitted with end dams. A formed metal or preformed plastic pan outperforms a site-built membrane pan on a broad span, because it holds its slope under the weight of the window.
The drainage path does not end at the sill. Water leaving the pan needs somewhere to go: a weep path through the cladding, a gap at the bottom of the trim, or a scupper in a stucco system. If the cladding is sealed tight at the bottom, the pan fills and overflows back into the wall. End dams deserve special mention, because they are the detail most often skipped — and retrofitting one behind finished cladding is a demolition job.
| Warning sign | What it usually means | First check |
|---|---|---|
| Stain above the window head | Water entering at the head flashing lap | Inspect the head flashing joints and laps |
| Damp drywall at the sill corners | Sill pan overflowing or missing end dams | Check the pan slope and the weep path |
| Peeling paint on interior trim | Repeated wetting behind the frame | Look for failed sealant at the flanges |
| Musty smell near wide glass | Hidden moisture in the wall cavity | Probe the sheathing and check the attic side |
That table is a diagnostic shortcut, not a substitute for opening the wall when the signs point to hidden damage. If a stain keeps returning after a sealant repair, the problem is almost certainly in the flashing sequence rather than the sealant, and the fix is to remove the trim, inspect the layers, and rebuild them in the correct order.
Choosing a Head Flashing System for Your Cladding and Climate
No single head flashing design suits every wall. Brick veneer relies on a cavity and weep holes, stucco relies on a two-layer drainage plane, and fibre-cement siding relies on lapped joints and a rainscreen gap. The head flashing must tie into whichever system the wall uses, without blocking the drainage paths the cladding depends on. Climate sets the second variable: freeze-thaw cycles punish flashing that holds water, while humid regions demand ventilation so the wall can dry.
- Match the flashing to the cladding brick needs weep paths kept open, stucco needs a drainage mat, siding needs a rainscreen gap.
- Design for the worst storm, not the average a flashing that handles a light shower but fails in a wind-driven downpour is not a flashing.
- Keep the membrane out of sunlight UV exposure degrades self-adhered membranes, so a metal cap or trim should always cover them.
- Plan for movement leave room for the frame and cladding to expand and contract without tearing the flashing laps.
When cladding and climate pull in different directions, the answer is usually to add a layer rather than choose between them: a membrane beneath a metal cap, a drained cavity behind a sealed face, a secondary flashing behind the primary one. Redundancy is not waste — it is the difference between a window that survives a storm and a wall that quietly rots behind it.
When a Wide-Opening Head Flashing Job Belongs to a Specialist
A straightforward drip cap replacement on a standard window is a manageable job. A wide glass wall — especially one with structural mullions, a curved head, a masonry surround, or a history of leaks — is a different proposition. Call in a specialist when the opening is wider than about three metres, when the wall above the glass is masonry or stucco, or when there are signs of hidden damage such as soft sheathing or mould.
Even when a professional does the work, the homeowner's role is to ask the right questions: which flashing layers will be used, in what order, how the head flashing ties into the weather-resistive barrier, and whether a water test will be done before the trim goes back on. A contractor who answers clearly understands the system; one who waves them away with a tube of sealant is a contractor to avoid.
Window Head Flashing Designs FAQs for Large Glass Openings
Can a metal drip cap alone protect a very wide glass opening?
A well-formed metal drip cap can protect a wide opening when it is the right gauge, properly jointed, and fitted with end dams, but most professionals pair it with a self-adhered membrane underneath. The metal sheds the bulk of the water and shields the membrane from sun and damage, while the membrane seals the joints the metal cannot.
How far should head flashing extend past the sides of a wide window?
Head flashing should extend at least 150 millimetres past each jamb, and further on a wide opening — enough to lap fully over the side flashing and carry water clear of the frame. If the flashing stops flush with the frame, the water runs straight down the jambs instead of shedding outward.
Is sealant enough to waterproof the head of a large window?
No. Sealant is a backup, not a flashing system. It ages, shrinks, and cracks, and on a wide opening the movement of the frame works sealant joints open over time. A proper head flashing sheds water by gravity and geometry, so it keeps working even after the sealant has failed.
What is the most common head flashing mistake on wide glass walls?
Installing the layers in the wrong order is the most common mistake — typically the head flashing going on before the side flashing, or the membrane being applied over the window flange instead of under it. Either error creates a reverse lap that channels water into the wall instead of out of it.
How often should head flashing on large windows be inspected?
Inspect the head flashing and seals at least once a year, ideally before the rainy season, and after any major storm. Look for cracked sealant, rust on the metal, gaps at the ends of the cap, and water staining on the wall below. Catching a small failure early usually means a tube of sealant and an afternoon.
Final Thoughts: Keeping Large Glass Openings Dry for Decades
A wide wall of glass is one of the most rewarding features a home can have, and also one of the most demanding on the building envelope. The difference between a glass wall that stays dry for decades and one that rots its framing in silence is rarely the window itself — it is the few centimetres of flashing at the head, installed in the right order, with a drainage path that leads somewhere. Spend the modest extra cost on a layered system, test it before the wall is closed up, and inspect it once a year.